

If we talk about growing a business, the internet is one of the most popular channels to do so. Digital marketing has generated billions in revenue for millions of companies all over the world and your company can not stay back. Having your own website is the first step to getting into this ecosystem that can bring your business so many benefits.
So in this post, we will talk to those entrepreneurs or small business owners on a budget that wants to create their website free of cost to promote their services online.
What is a Content Management System (CMS)?
A Content Management System, abbreviated as CMS, is a no-code platform where you can create, edit and publish blogs, websites, and landing pages. Marketers, entrepreneurs, and almost any non-developer can use them to manage their content from an easy-to-use interface. This turns their website management process into a more friendly experience.
- WordPress
- HubSpot CMS
- Google Sites
- Webflow
- Weebly
- Wix
- Shopify
- Blogger
Each one provides a couple of tools to create your website depending on your needs and budget (not all of them have a free version).
Build your website for free with Hubspot CMS
Now, let's get into the website creation matter. If you start asking yourself and your friends “how can create a website with no cost?”, HubSpot’s brand new CMS Hub Free is, in our humble opinion, the best free website builder out in the market. Not only because you can build your free website with no monthly fees but you have also access to their free Marketing, Sales, and Service tools to grow your business.
With HubSpot CMS free tools you can make your own website look professional and optimized to grow your business faster than thought. Some of the free CMS tools are:
- Page Themes and templates
- SEO recommendations
- Blog
- Chatbot
- Forms
- Landing Pages
- Google Analytics Integration
Create your website free of cost in 7 steps
Step 1: Create an account
First of all. Go into HubSpot’s Website and create your account for free. (No credit card needed). This will give you access to all of their free CMS, Marketing, CRM, Sales, and Service tools. Yes. For free.

Step 2: Pick your theme
Once inside your new portal, you can follow the onboarding, or skip it and go directly to the Asset marketplace.
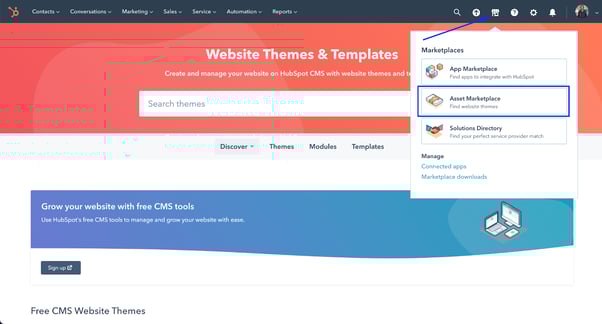
There you will find a bunch of site themes and filters depending on your needs, industry and if you want, see all free and paid themes.
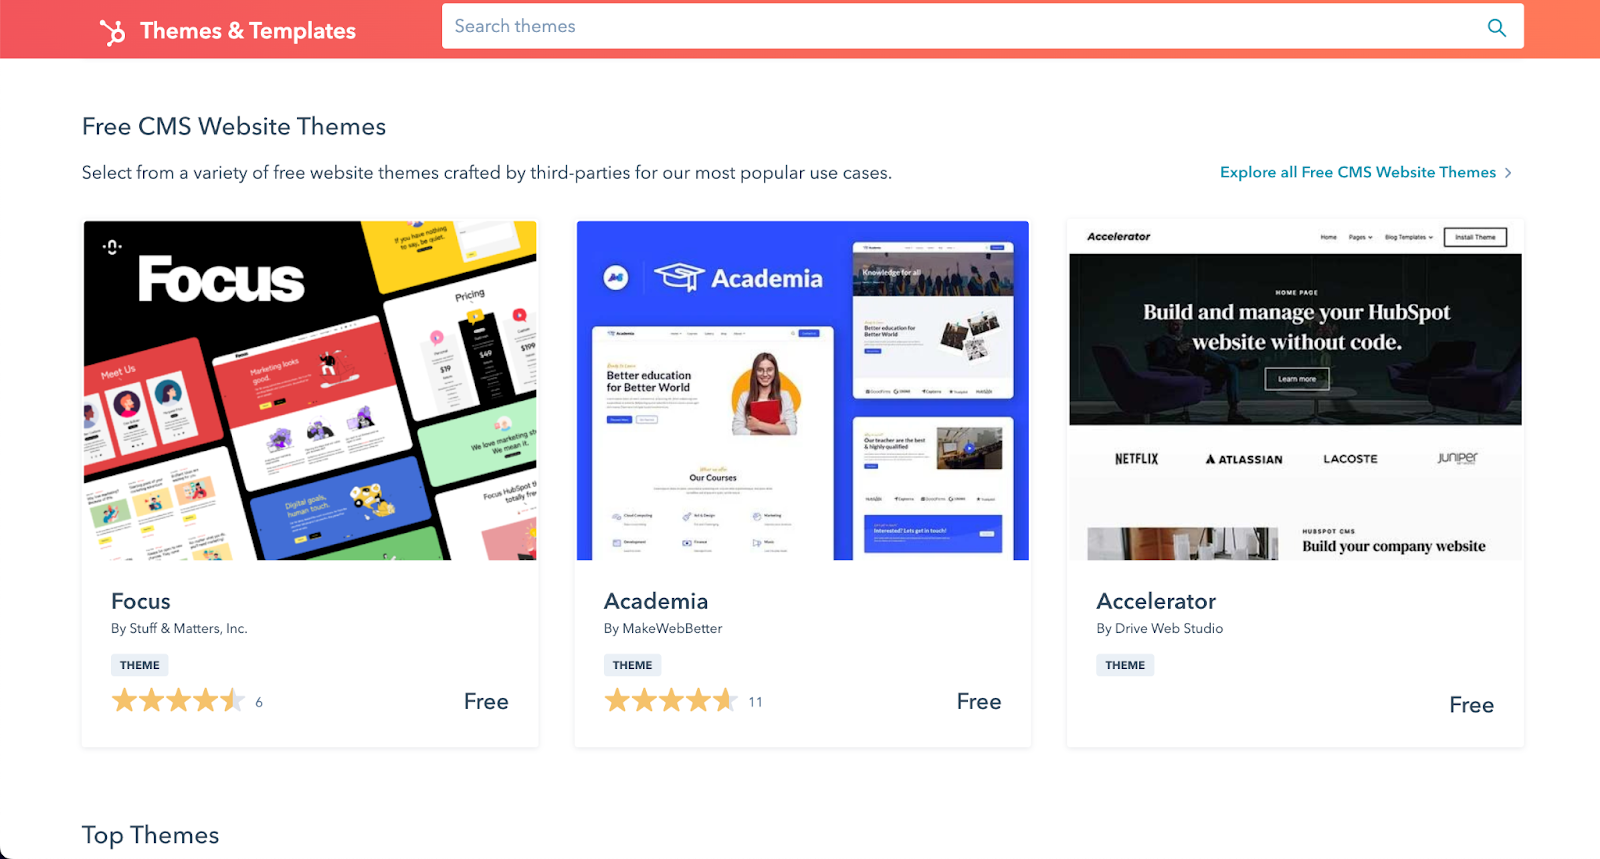
Once you have a choice, click on the “Install for free” orange button and follow further steps.
Step 3: Customize with your brand colors and logo
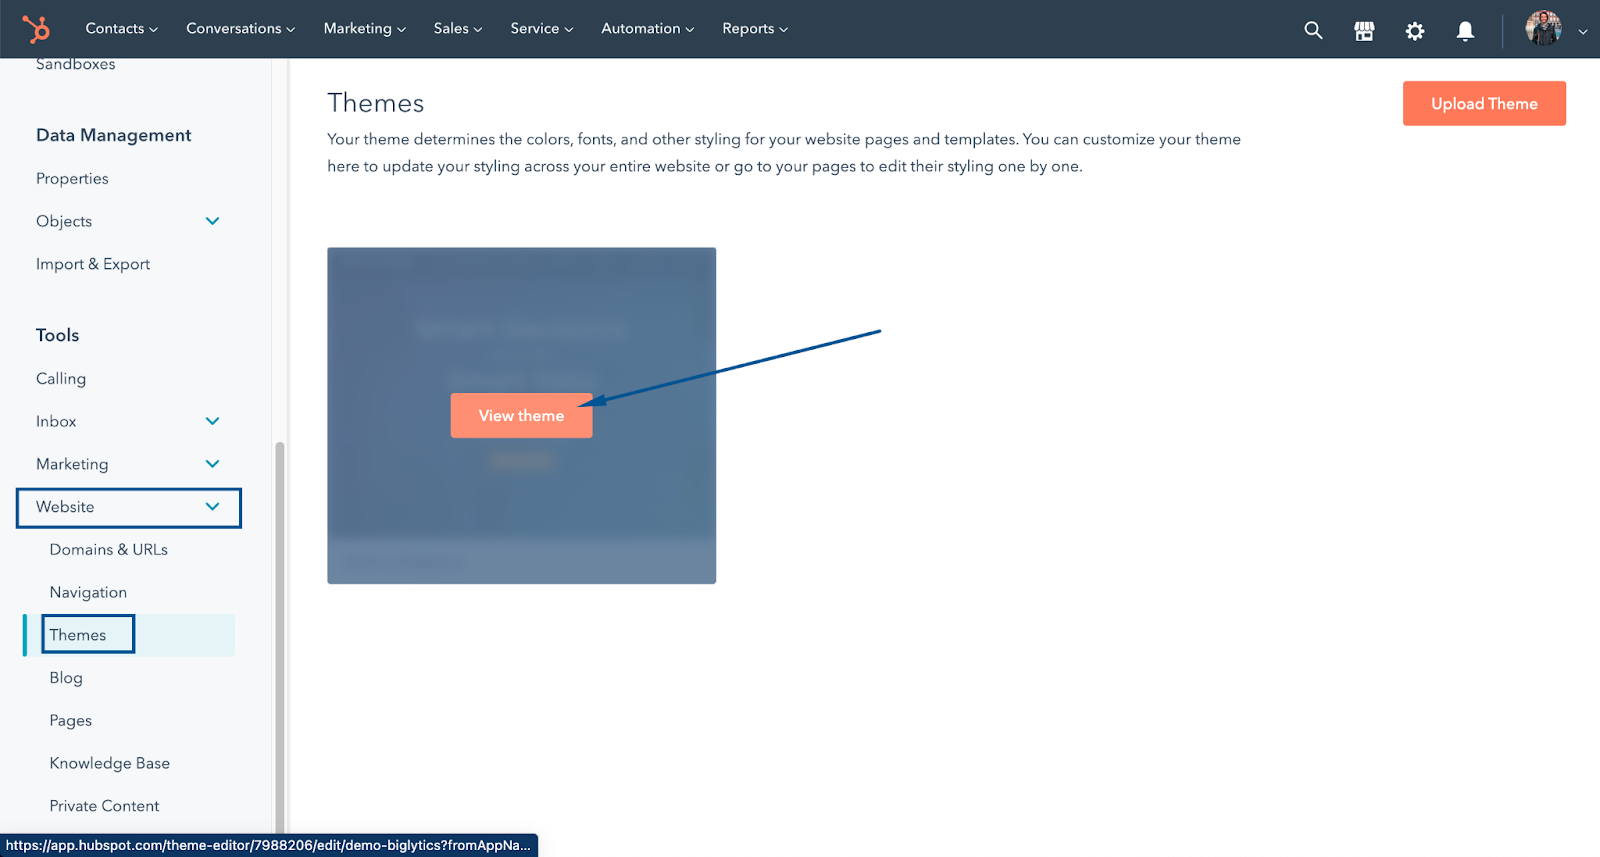
Now that you have your theme installed is time to customize your website with your brand colors and assets.
- Go into the Settings icon at the top right.
- At the left bar, scroll down to Website - Themes
- Click on View Theme
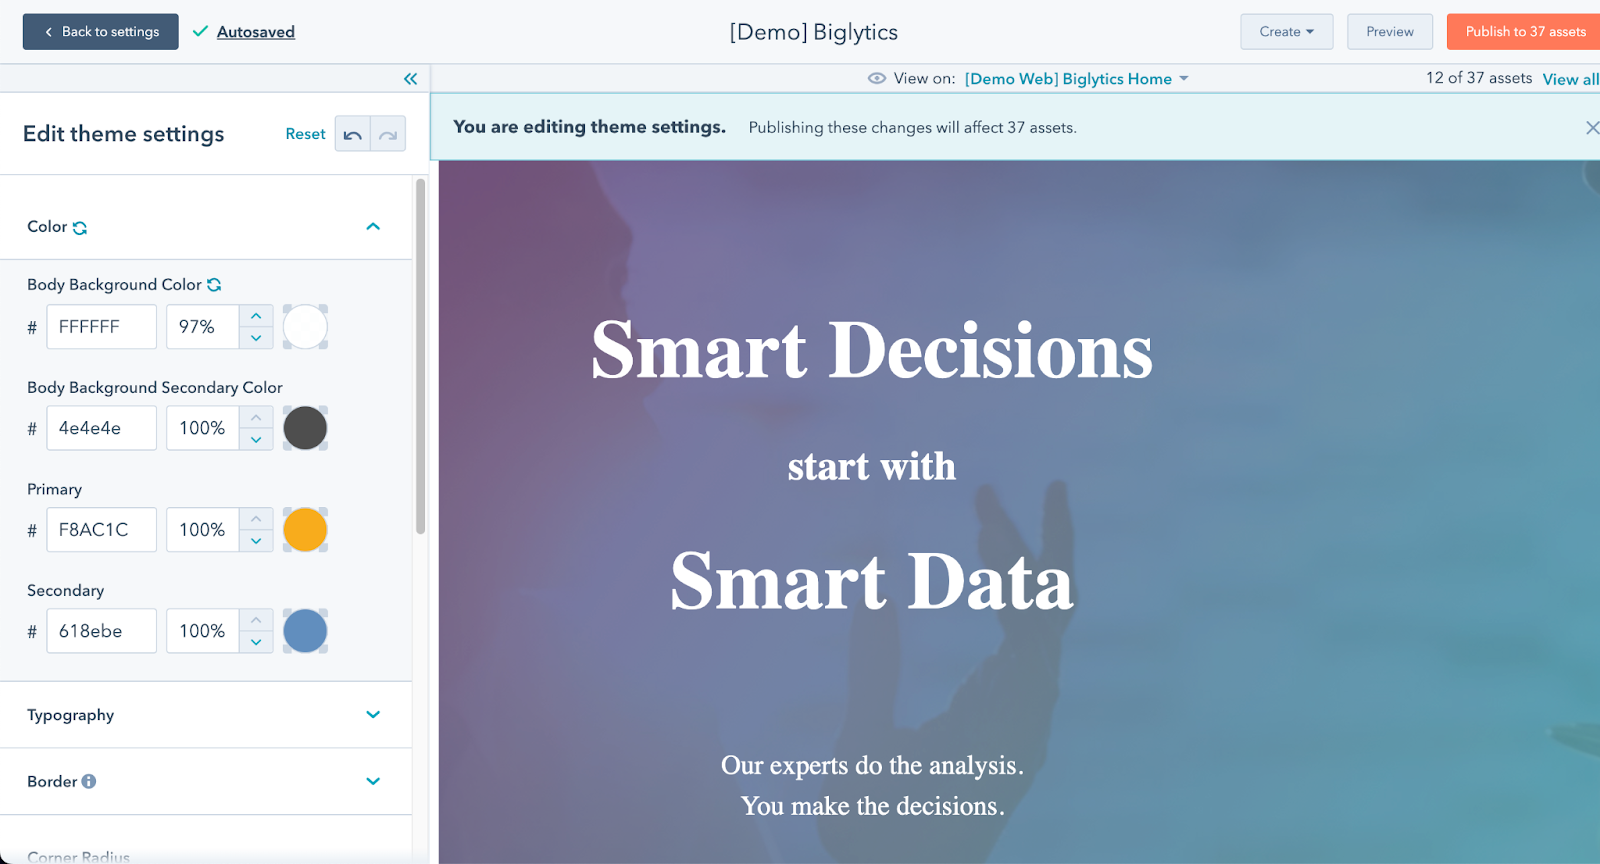
- Edit your theme with your band colors and typography. Once you’ve finished, click on the “Publish” button at the top right corner.
Step 4: Upload your content and Create your Pages
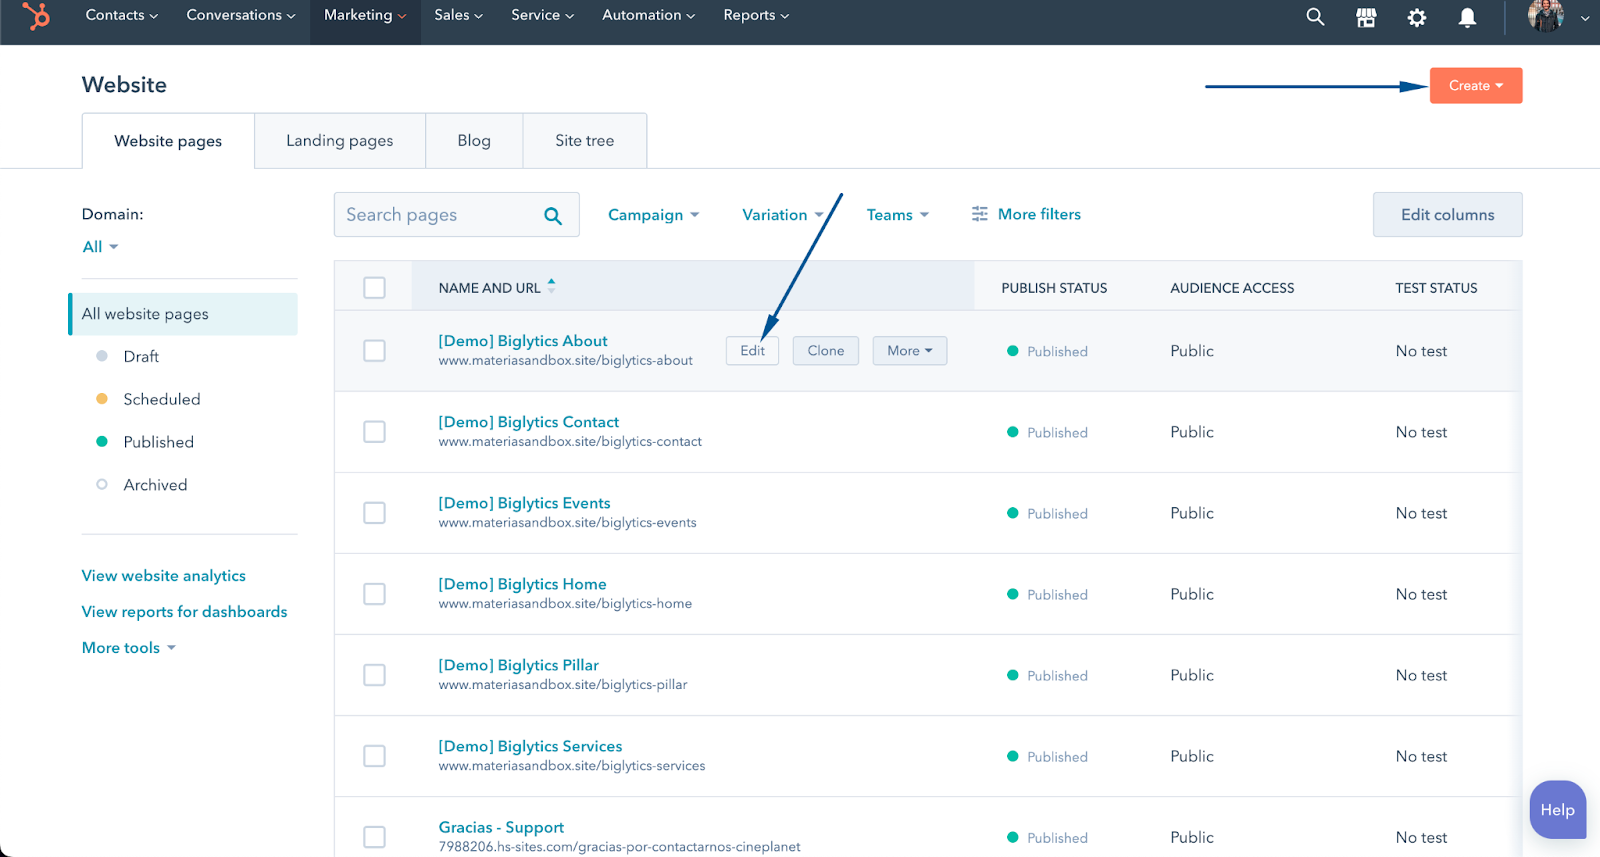
Change every test text with your content as your value proposal, your history, and how you deliver your services. Create pages for every service. To edit and create pages for your website, go into the top bar Marketing - Website - Website Pages.
-
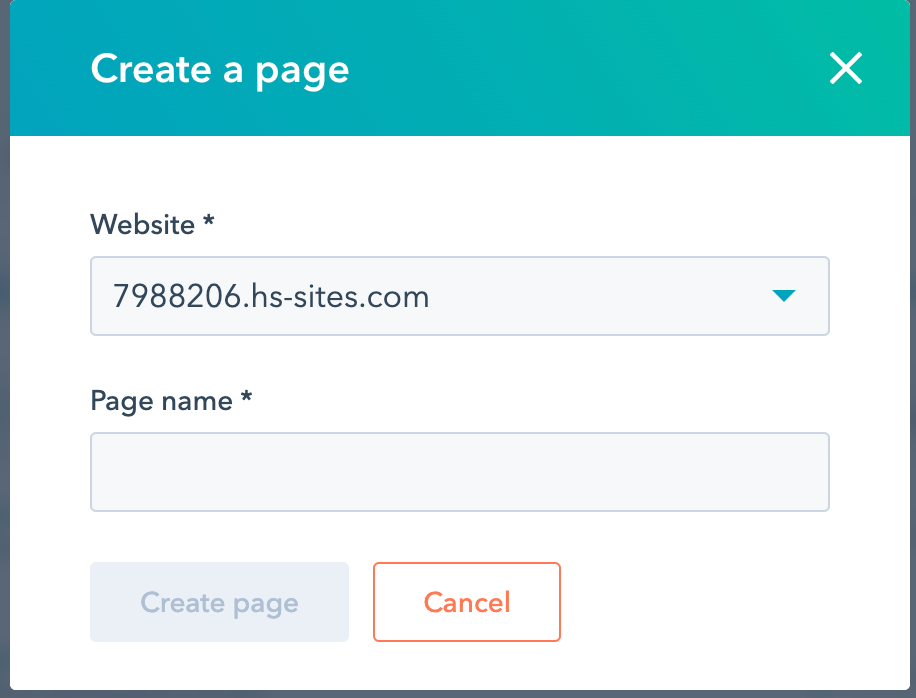
Create a new page
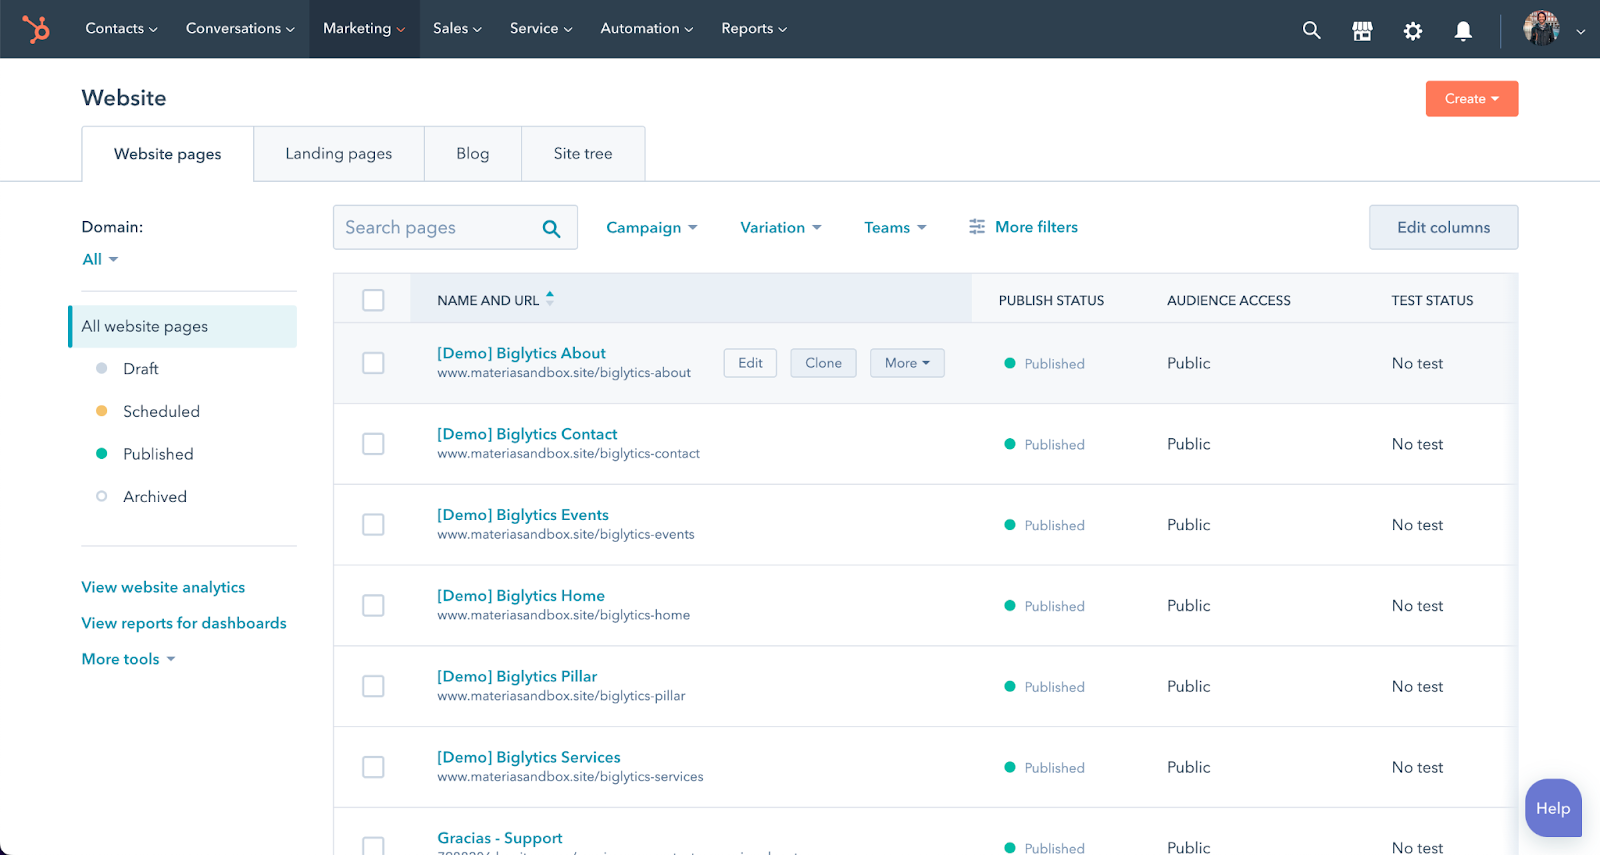
Once inside, you will see all your already existing website pages. To create a new page. Click on the Create Button at the top right corner and select Website Page.
-
Select a template for your page
Then, you have to select the template for the page you will create. Every theme has multiple page templates with different structures depending on what type of page you are going to create, like if it is for a service page, o about us, and so on. Now it is time to select one of these.
If you want to see the template before selecting it, you can click on “Preview Template”. After you decide which template is perfect for your page, click “Select Template”.

-
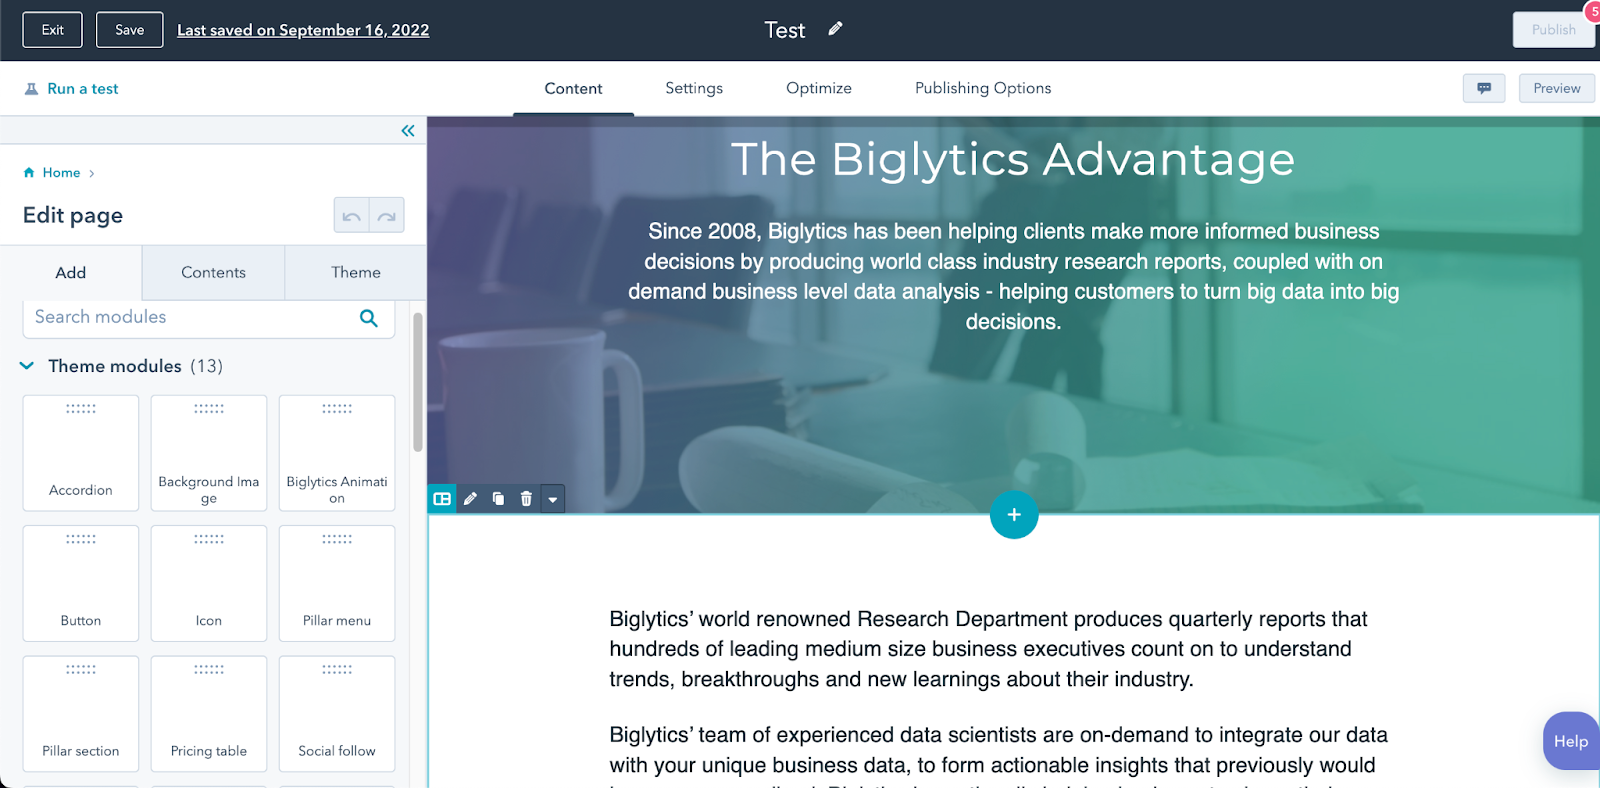
Edit page content
While inside the page editor, it is time to start creating your content and uploading it to your new page. This process can be a little tough if you don’t know where to start, so I recommend getting some inspiration from your reference brands and competitors.
HubSpot CMS drag-and-drop editor makes everything easier when creating your pages with their predesign modules. There are so many of them that can help you with some ideas on how to display your information. Also, each theme itself has a native structure and ver well-designed modules that will give your website a professional look.
-
Setup your page title, meta description, and slug
Now it is time to create your page title. For that, you need to go to the Settings Tab. Here you can set up how your page will appear on search results and customize the URL.
Once you have finished, smash that “Publish” orange button.

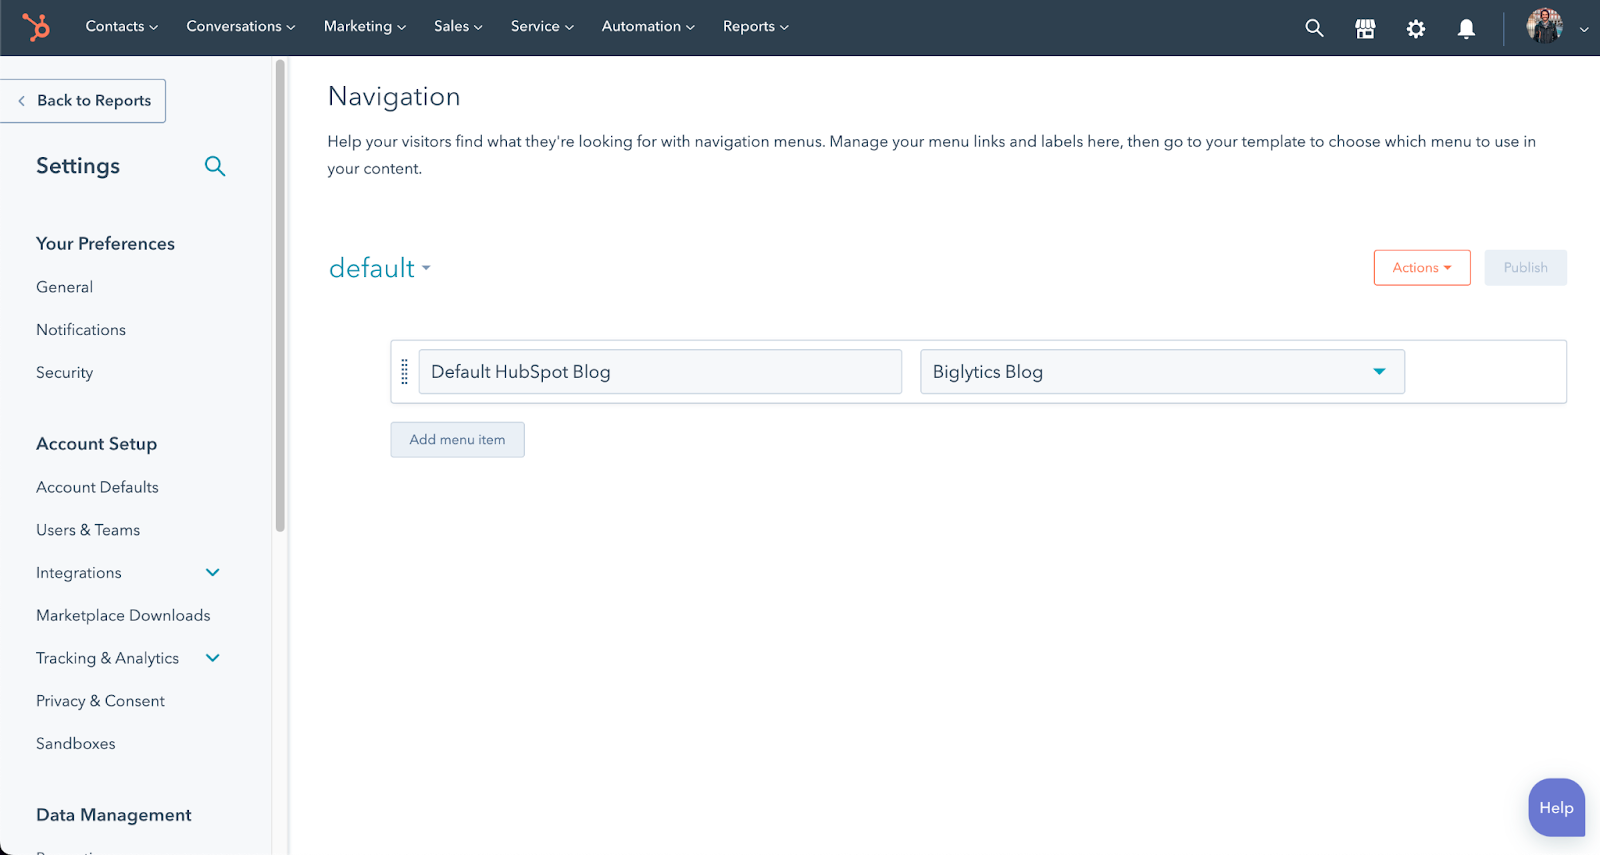
Step 5: Create your Nav Menu
We are almost done! After creating every single page for your site, uploading your content, images, logo, and customizing with your brand’s look and feel, it is time to give your visitors a guide to know what they can find on your site. Here is when menus are crucial to give them quick access to your most important content.
To get into the advanced menus setting, let’s get inside the Settings page and navigate to Website - Navigation. Now you can add pages to your menu that will be displayed on your site’s header.
Step 6: Setup your forms
You want people to get in contact with you. So creating forms for your new website is a MUST. Create a form so they can leave their contact information and requirements. Use the forms tool so you can receive every new lead directly in the CRM.
- Let’s go again into the Marketing tab on the top bar. Then, select Forms.
- Smash the Create button.
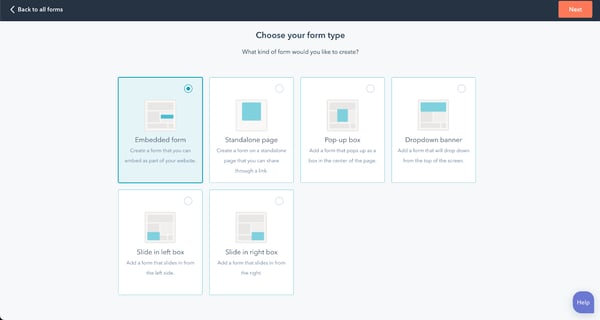
- Select “Embedded Form” to create a form that will be within the content of your page.
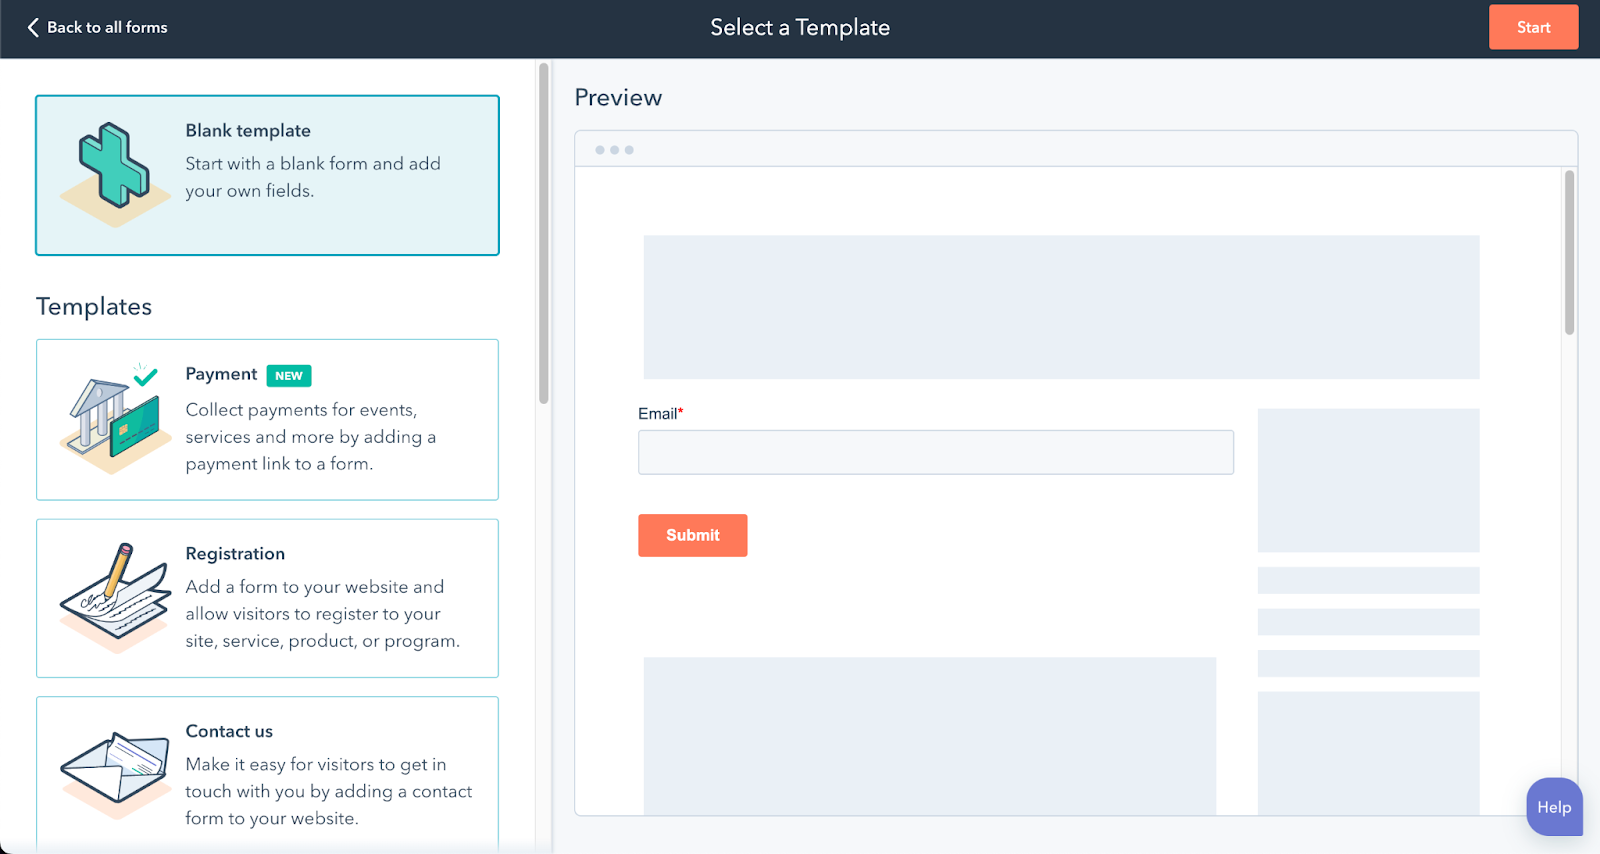
- Select a template from the list, or start on a Blank Template
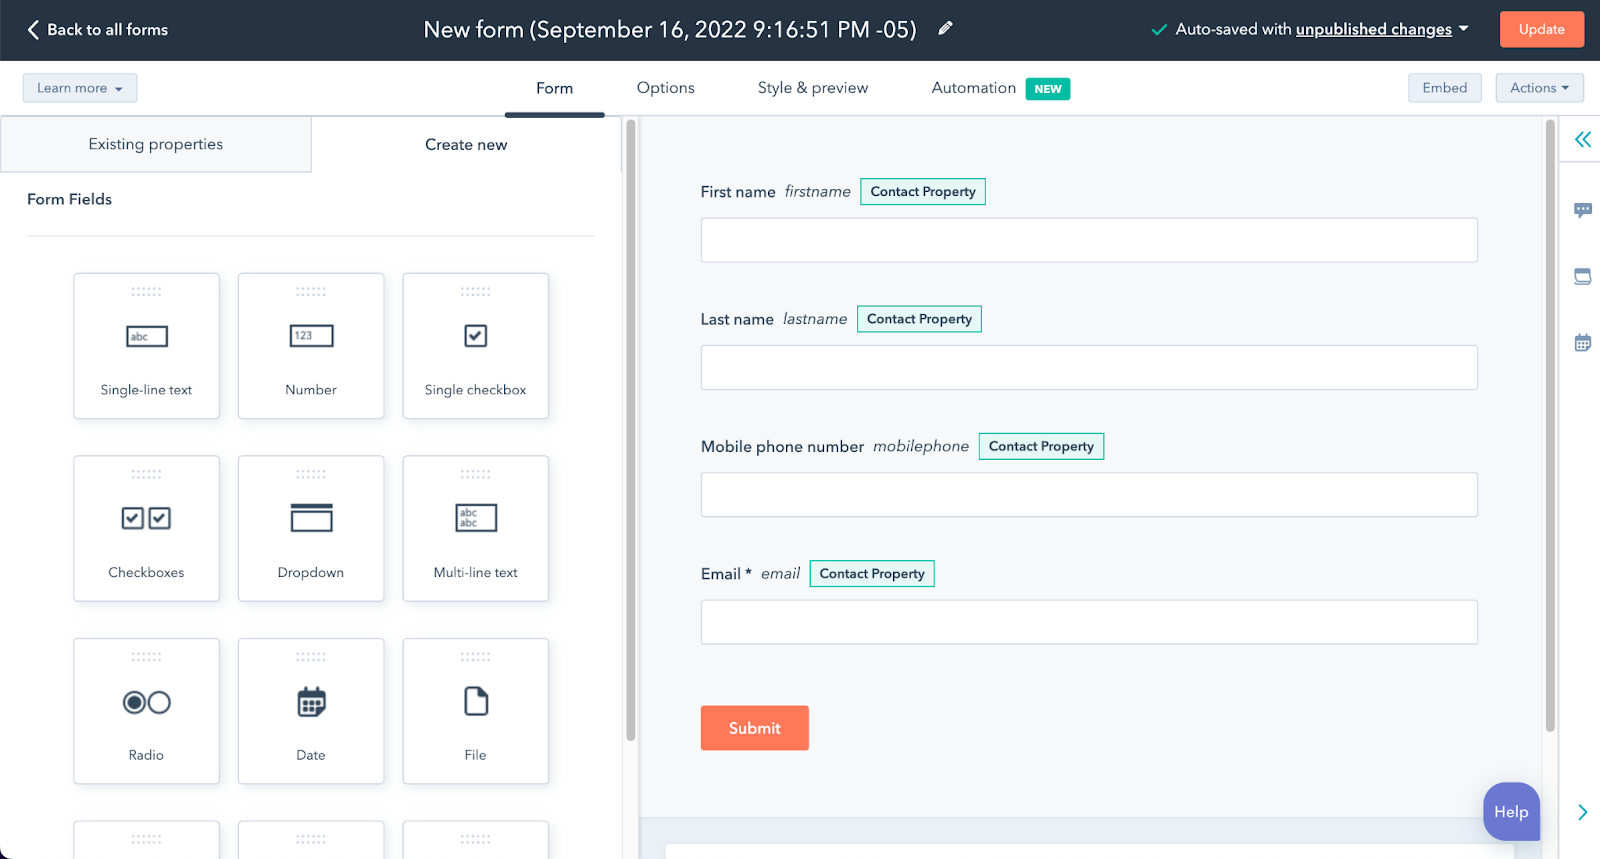
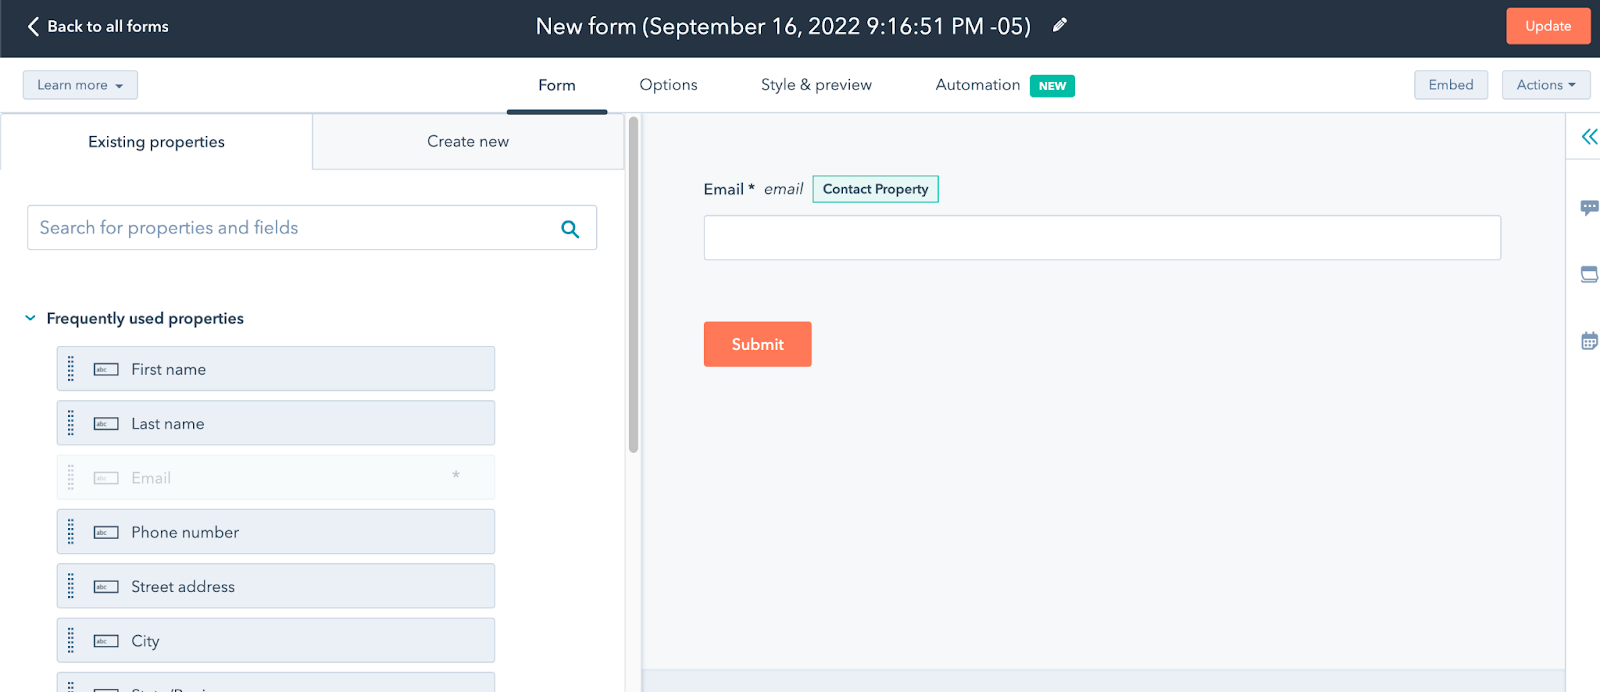
- When creating your form just simply drag and drop every property showing in the left column to add it to your form. This way you can add as many fields as you need depending on what information you need to collect from your visitors.
- If you need a field that does not exist in the list. You can create your own properties using the Create New tab. Just choose from the options:
- Single-line text
- Number
- Single Checkbox
- Dropbox
- Radio
- Date
- File
- Now that you have created your first form, it is time to embbed it into your website, so it can be seen and filled. Let’s go again to Marketing - Website - Website Pages and this time we are going to hover and click on the Edit button from the page that you want to add the form.
- To insert your form you just need to look for the Form module at the left bar. Just type in “Form” and it will show for you. Drag and drop the module where you want it to be.
You can also skip this step if you template already has a form module set into the page.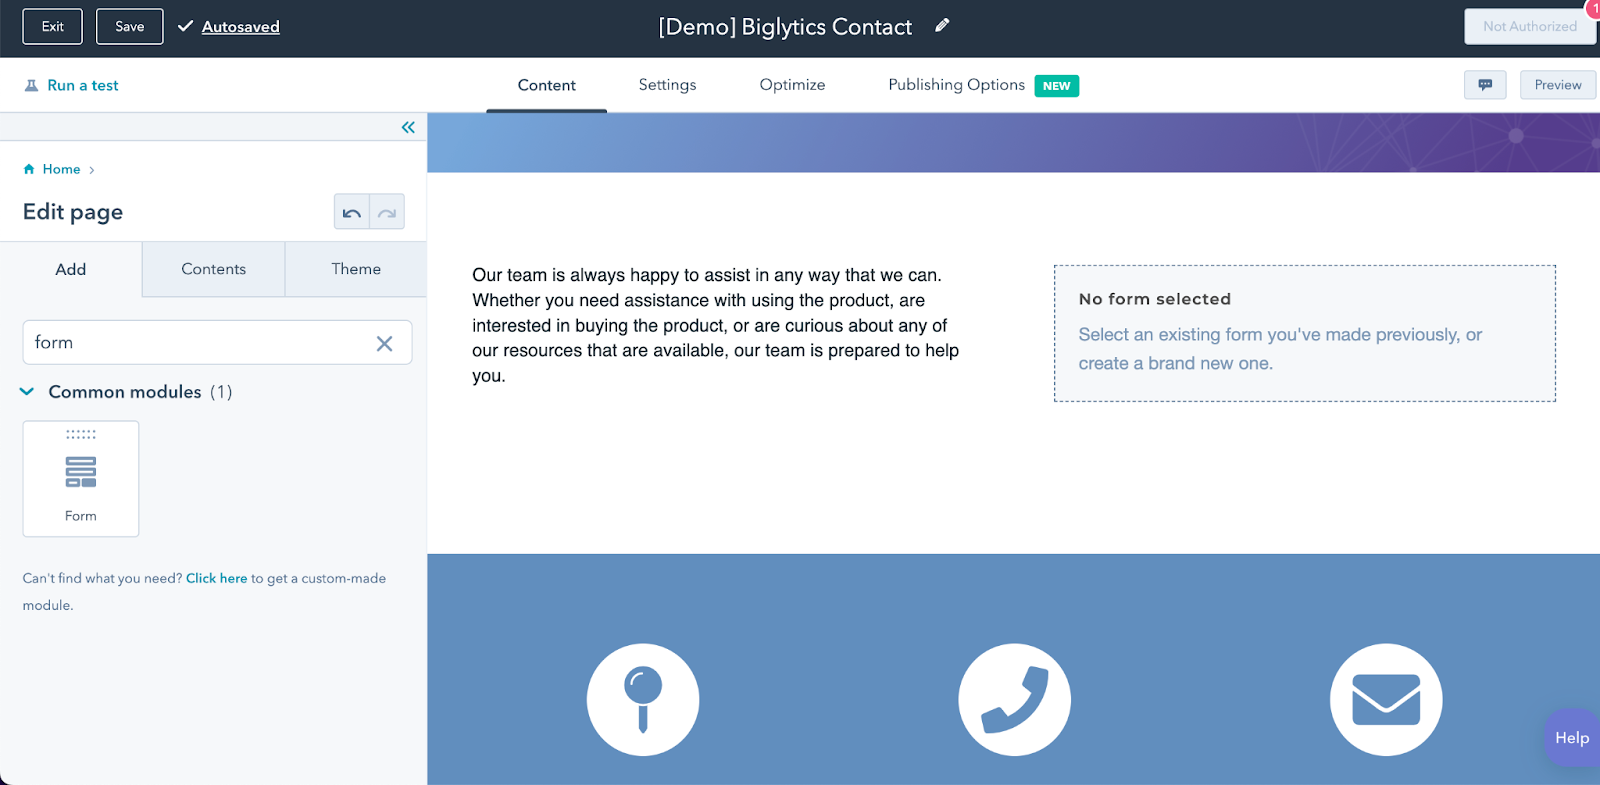
- Finally, click on the module and right in the Content tab in the left column, select your form from the list, and voila! your new powerful lead generation tool is ready to get some contacts.
- You can add some styling to match your form with the rest of your look and feel at the Styles tab from the left.

Step 7: Connect your domain
Now that you have everything set up, it is time to put your website on Live Mode. For this, you need to connect your brand domain (ex. www.testbakery.com ) to the CMS. For this, you can follow the steps directly from HubSpot here.
If you think this is more of a technical step and do not feel so confident yet, you can always contact a developer for some help, or contact us here so we can happily do it for you.
Step 8: Promote your Website with free marketing tools
If you have reached this final step, probably you have your website online and waiting for some traffic. Now it is time to promote your new site, optimize it and publish it everywhere so people can find it and know more about your product or services!
There are so many ways to get people to visit it. Here are some ideas and inside HubSpot you can access to their free marketing tools to do some of these.
- Email marketing: If you already have a contacts list, start with an email campaign saying “Hey everyone! There’s a brand new website that you should visit!”. Upload your contacts and start with pre-designed templates. Don’t forget to put a powerful call to action so people know what to do.
- Run ads: You can create social ads or Google Ads campaigns to give some spice to your awareness strategy. This is one of the fastest ways to drive traffic because can reach people that don’t even know you yet. Also, you can target a specific kind depending on their interests and location.
- Social media: You probably have an Instagram or Facebook account with some followers that react to your posts, and leave some comments. It is the perfect way to promote your website! Create a post telling your community about your new space.
- Blog: You can start a blog and create some content so people can find you on Google when they search terms that you talk about.
Conversion Tip:
Create a Free Content Offer
You can give for free a small piece of content like a template, an ebook, or an infographic that helps your potential customers with specific pain in exchange for some of their information so you can share more about your brand and build your contacts list. Creating long-term and quality relationships with them will keep you on their radar when facing some pains you can help them with.
For this, you can use the Landing Page and Forms tool to create your next lead-generation campaign and promote it by using Ad tools.
Conclusion
If you are running a small business and need some exposure, there are free tools out in the market that can help you grow. Now that you know how to create a website free of cost for your business, there is no excuse for not being out there to capture new opportunities. Just choose your theme, customize it and launch it.
Also, if you feel that some help is needed for creating your website or getting new leads for your company, contact us so we can help you grow with the best technology and digital marketing solutions.

Let us know your comments